For some reason, I lost my mind and have no "cover" shot for this. So I borrowed this photo off of the internet. I take no credit for it. The video below, however, does demonstrate the process Canon and I went through to make our very simple sauce.
We were down at my parent's fishing camp in Cocodrie, LA this past weekend for Father's Day. You know, doing the whole fishing weekend deal. Now if you know anything about a place such as this, you are probably aware that once you are there, you sort of have to "make do" with ingredients on hand. Since it's about a mile from the literal end of the road, where the United States turns into the Gulf of Mexico, if you have to go back "into town" to get something, it can take you a bit. Ha!
Well we happen to have a big bag of chicken thighs in the fridge. Someone suggested we throw them on the grill. Before you know it, the words "Why don't we make some BBQ sauce to baste those with?" just involuntarily popped out of my mouth. I don't know where these things come from sometimes. It makes me shake my head. And that's how I get myself into these things. So of course this BBQ sauce is made with whatever pantry ingredients I found on hand. Everyone enjoyed it a great deal... and of course the fact that there are no preservatives or big hard words is a plus! 😀
* I didn't put any real "heat" (like cayenne) in this recipe, because my daughter is very sensitive to it. But feel free to add some if you'd like a little extra kick.
Method:
Saute diced onions in EVOO until soft and translucent. Add other ingredients over medium heat. Cook until desired consistency. Remove from heat and allow to cool. Blend to smooth consistency. Keep in covered container up to one week in refrigerator. Funny story about this: The leftover BBQ was stored in an old Smuckers jelly jar and stored in the fridge. You know how it goes, right? The next evening at dinner, my stepdad says, "Oh by the way, Julie. I found out where you stored your BBQ sauce." ??? "We got up this morning at 5am, made breakfast for everyone before going out... and something just seemed 'off' when I spread that jelly on my toast." Bahahaha!!! 🤣🤣🤣😂😂😂
Yep, this one might be a little bit different folks... but I just love the combination of fruit and herbs together! Several weeks ago (because I'm so far behind on my posts), my parents were over for the weekend and my husband had brought home an entire flat of the most wonderful strawberries! As a fun "project," I asked my mom to show me how to make jelly/jam. This is definitely not something I've ever done, and I was curious. So this post really belongs to my parents and my daughter - the Lovely Lily! You'll notice that these are not my hands. Ha.
You are wondering about the basil, right? Well of course during the process of serving as the official "project photographer," I got to wondering... "Wow, that sure is beautiful and so fragrant! I betcha that would be amazing with some chopped up basil or thyme in there!" And that little kernel of thought is all it took. We made some with and some without the herbs; but honestly, the jelly with the herbs was super awesome! Feel free to make yours both ways as well, if you just want to make plain old jelly. But hey, playing with your food is always a lot of fun!
Before anyone leaves me snarky comments, I know this is technically "jam," but in my house, somehow it all gets called "jelly." So please do me a favor and play nice.
Prepare the strawberries. All the strawberries need to be hulled and cored... and smashed. Lily used a potato masher for this. Smushing up the berries is a great job for a kid if you have one hanging around. It also turns out that the recipe calls for an insane amount of sugar. :( So Lovely Lily leveled off each cup and measured it all out.
The only pot I had that was large enough to accommodate this whole operation was a pressure cooker (without the lid on), so that's how they did it. In went the berries and the SURE-JELL.
Lastly, a teaspoon of butter. We'll call this "grandmother magic." And off the berries went to begin the cooking process.
For the next part of the process, my mother took over. The jars and lids need to be sterilized and prepared. They need to be submersed and boiled for at least 10 minutes.
Allow the hot water to remain in them while the berries are cooking.
Bring the berries to boil on medium heat.
Boil the berries for at least a couple of minutes on a full rolling boil (a boil that doesn't stop bubbling when stirred) on high heat.
Add sugar to the fruit mixture in the pot. Return to a full rolling boil. Boil exactly 1 minute, stirring constantly. DO NOT REDUCE THE SUGAR IN THE RECIPE SINCE THAT WILL RESULT IN A FAILURE TO SET. *This statement comes directly from the package. Don't blame me for this crazy amount of sugar.
granulated sugar
Ladle immediately into prepared jars, filling each to within 1/4" of top. Check the canning section of your grocery store for these wide mouth canning funnels. They are the perfect size for fitting into the top of the jars.
Long handled tongs work great to add the sterilized lids to the jars to avoid contamination with your fingers. Also, both the jars and the jelly are like hot molten lava right now! If you have any drips on the jar rims and threads, you will want to make sure you wipe those clean.
You will want a rag or some sort of protection while screwing the rings onto the lids. These jars are super HOT right now!
Here we have one perfect little jar of strawberry jelly. But was I happy with that? Nooooo... I had to somehow start thinking of something different to do with it.
So I ran out into the herb garden and picked some fresh basil and some fresh thyme and decided that we were going to have some fun! :) Of course this is completely optional, but I don't think you'll be disappointed. For this first one, I chopped the basil and for this small jar (about 1 cup of jelly), I added a large pinch (probably about 1 - 1 1/2 tsp) of chopped basil.
chopped basil
I gave it a little stir to distribute it throughout.
For this one, I did the same with some thyme leaves. Aren't the colors pretty together?
fresh thyme
Now place the jars of jelly back into the pot. If you don't have a canning rack, you can place a towel in the bottom of the pot to keep them off of the bottom and to keep them from bumping around in there. They need to be completely covered in the water by about 2 inches. Bring the water to a gentle boil and allow to boil for around 10 minutes. You can see that we have them labeled according to which herbs we added. We also left some plain.
Carefully remove them from the boiling water and set them upright on a towel to cool completely.
You can see that my mother used a two-tong method to accomplish this. Now during this cooling process, you will start to see the lids pop down. You may even hear them "pop." After they cool, you can check the seals by pressing the center of the lids with your finger. If they spring back up, then they are NOT sealed, and refrigeration is necessary. If they are sunk in, and do not pop up, then they are sealed and you can store them unopened in a cool, dry place for up to 1 year. Refrigerate opened jams/jellies for up to 3 weeks.
Well of course we had to test some out, so we made some quick muffin tin drop biscuits, some homemade whipped cream, sliced up some more fresh berries, and used that gorgeous strawberry basil jelly as part of an absolutely killer strawberry short cake!
Now I will fully admit, there's also nothing wrong with just having some jelly on your toast with a cup of tea on a rainy day, either. That's real life, folks. :)
The Menu Musings cookbook is sure to be a hit at your house, and will make great gifts! For more information, here is a link!
If you are new to MenuMusings, click here to subscribe so you won't miss a thing! I'll send you notifications of new posts to help you avoid that proverbial cooking rut. You can also follow me on Pinterestand on the MenuMusings facebookpage.
Also, Please be sure to visit my YouTube Channel for short video tutorials on selected videos. Watch me explain the steps of the recipes in just a few minutes! Just one more way that I'm giving you the tools to get in that kitchen!!! Aren't you curious? Click and see how many there are! :)
Here's just one example - Louisiana Crab Claws Bordelaise
Prepare the strawberries. All the strawberries need to be hulled, cored, and smashed. We used a potato masher for this. Smushing up the berries is a great job for a kid if you have one hanging around. It also turns out that the recipe calls for an insane amount of sugar.
The only pot I had that was large enough to accommodate this whole operation was a pressure cooker (without the lid on), so that's how they did it. Add the berries and the SURE-JELL. Lastly, add a teaspoon of butter. We'll call this "grandmother magic." Now start your berries went to cooking.
For the next part of the process, the jars and lids need to be sterilized and prepared. They need to be submersed and boiled for at least 10 minutes. Allow the hot water to remain in them while the berries are cooking.
Bring the berries to boil on medium heat. Boil the berries for at least a couple of minutes on a full rolling boil (a boil that doesn't stop bubbling when stirred) on high heat. Add sugar to the fruit mixture in the pot. Return to a full rolling boil. Boil exactly 1 minute, stirring constantly. DO NOT REDUCE THE SUGAR IN THE RECIPE SINCE THAT WILL RESULT IN A FAILURE TO SET. *This statement comes directly from the package. Don't blame me for this crazy amount of sugar.
Ladle immediately into prepared jars, filling each to within 1/4" of top. Check the canning section of your grocery store for these wide mouth canning funnels. They are the perfect size for fitting into the top of the jars. Long handled tongs work great to add the sterilized lids to the jars to avoid contamination with your fingers. Also, both the jars and the jelly are like hot molten lava right now! If you have any drips on the jar rims and threads, you will want to make sure you wipe those clean. You will want a rag or some sort of protection while screwing the rings onto the lids. These jars are super HOT right now!
Here we have one perfect little jar of strawberry jelly. But was I happy with that? Nooooo... I had to somehow start thinking of something different to do with it. So I ran out into the herb garden and picked some fresh basil and some fresh thyme and decided that we were going to have some fun! :) Of course this is completely optional, but I don't think you'll be disappointed. For this first one, I chopped the basil and for this small jar (about 1 cup of jelly), I added a large pinch (probably about 1 - 1 1/2 tsp) of chopped basil. I gave it a little stir to distribute it throughout. I did the same with some thyme leaves.
Now place the jars of jelly back into the pot. If you don't have a canning rack, you can place a towel in the bottom of the pot to keep them off of the bottom and to keep them from bumping around in there. They need to be completely covered in the water by about 2 inches. Bring the water to a gentle boil and allow to boil for around 10 minutes. Carefully remove them from the boiling water and set them upright on a towel to cool completely.
My mother used a two-tong method to accomplish this. Now during this cooling process, you will start to see the lids pop down. You may even hear them "pop." After they cool, you can check the seals by pressing the center of the lids with your finger. If they spring back up, then they are NOT sealed, and refrigeration is necessary. If they are sunk in, and do not pop up, then they are sealed and you can store them unopened in a cool, dry place for up to 1 year. Refrigerate opened jams/jellies for up to 3 weeks.
Okay, now THIS was a shock to me.... This creamy peppercorn vinaigrette was a big hit at our house! I really thought that the majority of my family would be reaching for the standard ranch dressing, and that I was making this for myself; but as it turned out, even the kids loved it! Whaaat?! My six year old said "Oh mom, I LOVE this new ranch dressing you made!" HaHa.... Well... Ummmm... Okay! Let's just go with that! And the best part is that all you have to do is throw the ingredients together in a food processor or blender and give it a whirl until its all combined. You probably have all these things in the refrigerator already. After that, you can refrigerate it (covered) for about a week and it's still mighty delicious. :)
My friend Barb was going out for her birthday a while back and we were discussing the restaurant. I looked up the menu and saw a salad similar to this calling out my name from like 900 miles away. That didn't seem to be a viable option for me, so I set about the business of creating my own version. I love a good hearty hearty salad with a mix of lean proteins and lots of different flavors and textures. I get that trait from my mother, who is the best salad maker ever. If you aren't a big salad fan, the marinated beef can be made into quesadillas (that's what my kids had), tacos or nachos, and the dressing can be used for as many things as you can dream up.
What's great about this salad, is that it lends itself SO WELL to making up all the components ahead of time, and then putting them all together when you are ready for a pretty quick dinner.
Argentinean chimichurri sauce* (see food nerd notes)
1/2 bunch cilantro
1/2 bunch parsley
6 - 8 cloves garlic
3/4 c extra virgin olive oil
1/4 c red wine vinegar
juice from 1/2 of 1 large lime
2 Tbsp diced red onion
1 tsp black pepper
1 tsp kosher salt
1/4 tsp red pepper flakes
Step-by-Step:
Ranch -
Add everything to a food processor or blender and combine. You can make this ahead of time and have it ready in the refrigerator.
1/2 cup mayonnaise
1/2 cup sour cream
1/3 c freshly grated Parmigiano reggiano
2 Tbsp freshly squeezed lemon juice
2 Tbsp milk (full fat)
2 tsp freshly ground black pepper
2 medium garlic cloves, rough chopped
1/2 tsp kosher salt
Mix to combine.
And here it is! So creamy... All you need is a lovely veggie tray and you could be all set for dipping!
Chimichurri -
We are going to use this Argentinean "sauce" as a marinade for our beef. The directions are the same as the vinaigrette. Add everything to a blender and give it whirl until it is combined to your satisfaction.
If you aren't a cilantro fan, feel free to use all parsley rather than half and half cilantro and parsley.
1/2 bunch cilantro
6 - 8 cloves garlic
(oops! Forgot to photograph.... 1/2 bunch parsley as well as cilantro)
2 Tbsp diced red onion
You will get more juice from that lime if you heat it up first in the microwave for about 15 seconds and then roll it under firm pressure on cabinet before cutting it.
juice from 1/2 of 1 large lime
1/4 c red wine vinegar
3/4 c extra virgin olive oil
1 tsp kosher salt
1 tsp black pepper
1/4 tsp red pepper flakes
Now blend.....
Note - If you are going to use the chimichurri as a condiment for your meat, and NOT a marinade, I would not blend it. I would put it in a food processor and just pulse it until you get it to a sort of chunky salsa consistency. But that was not my intended use here.
Marinate the flank steak in the chimichurri in a ziptop bag for at least an hour or so. You can definitely leave it in there for more. Now just wait a second, dang it! If I had intended upon someone coming in and picking up the camera, I would have at least NOT used a autumn leaves apron in the Winter! ... I could have at least made an attempt to MATCH or something! ... but this is just a regular, after work day. This is how we roll, folks! :)
Add the chimichurri sauce to your flank steak to get this party started. The great part about putting it in a zip top bag is that it's easier to ensure it is contact with all the meat at the same time. And then when you're done, you just toss it out!
You'll want to make sure you squish out all the excess air from the bag before putting it in the fridge.
Here we go. Just throw it somewhere in the fridge. The other great thing about the bag is that is squishes in tight spots (as opposed to a bowl).
For the salad -
Make a quick black bean and corn salsa. Yum! This is one of my favorite snacks... and it's super healthy! Follow the link provided. This one is also best if you do it ahead of time, which would be a time saver for you when it comes time to put dinner together.
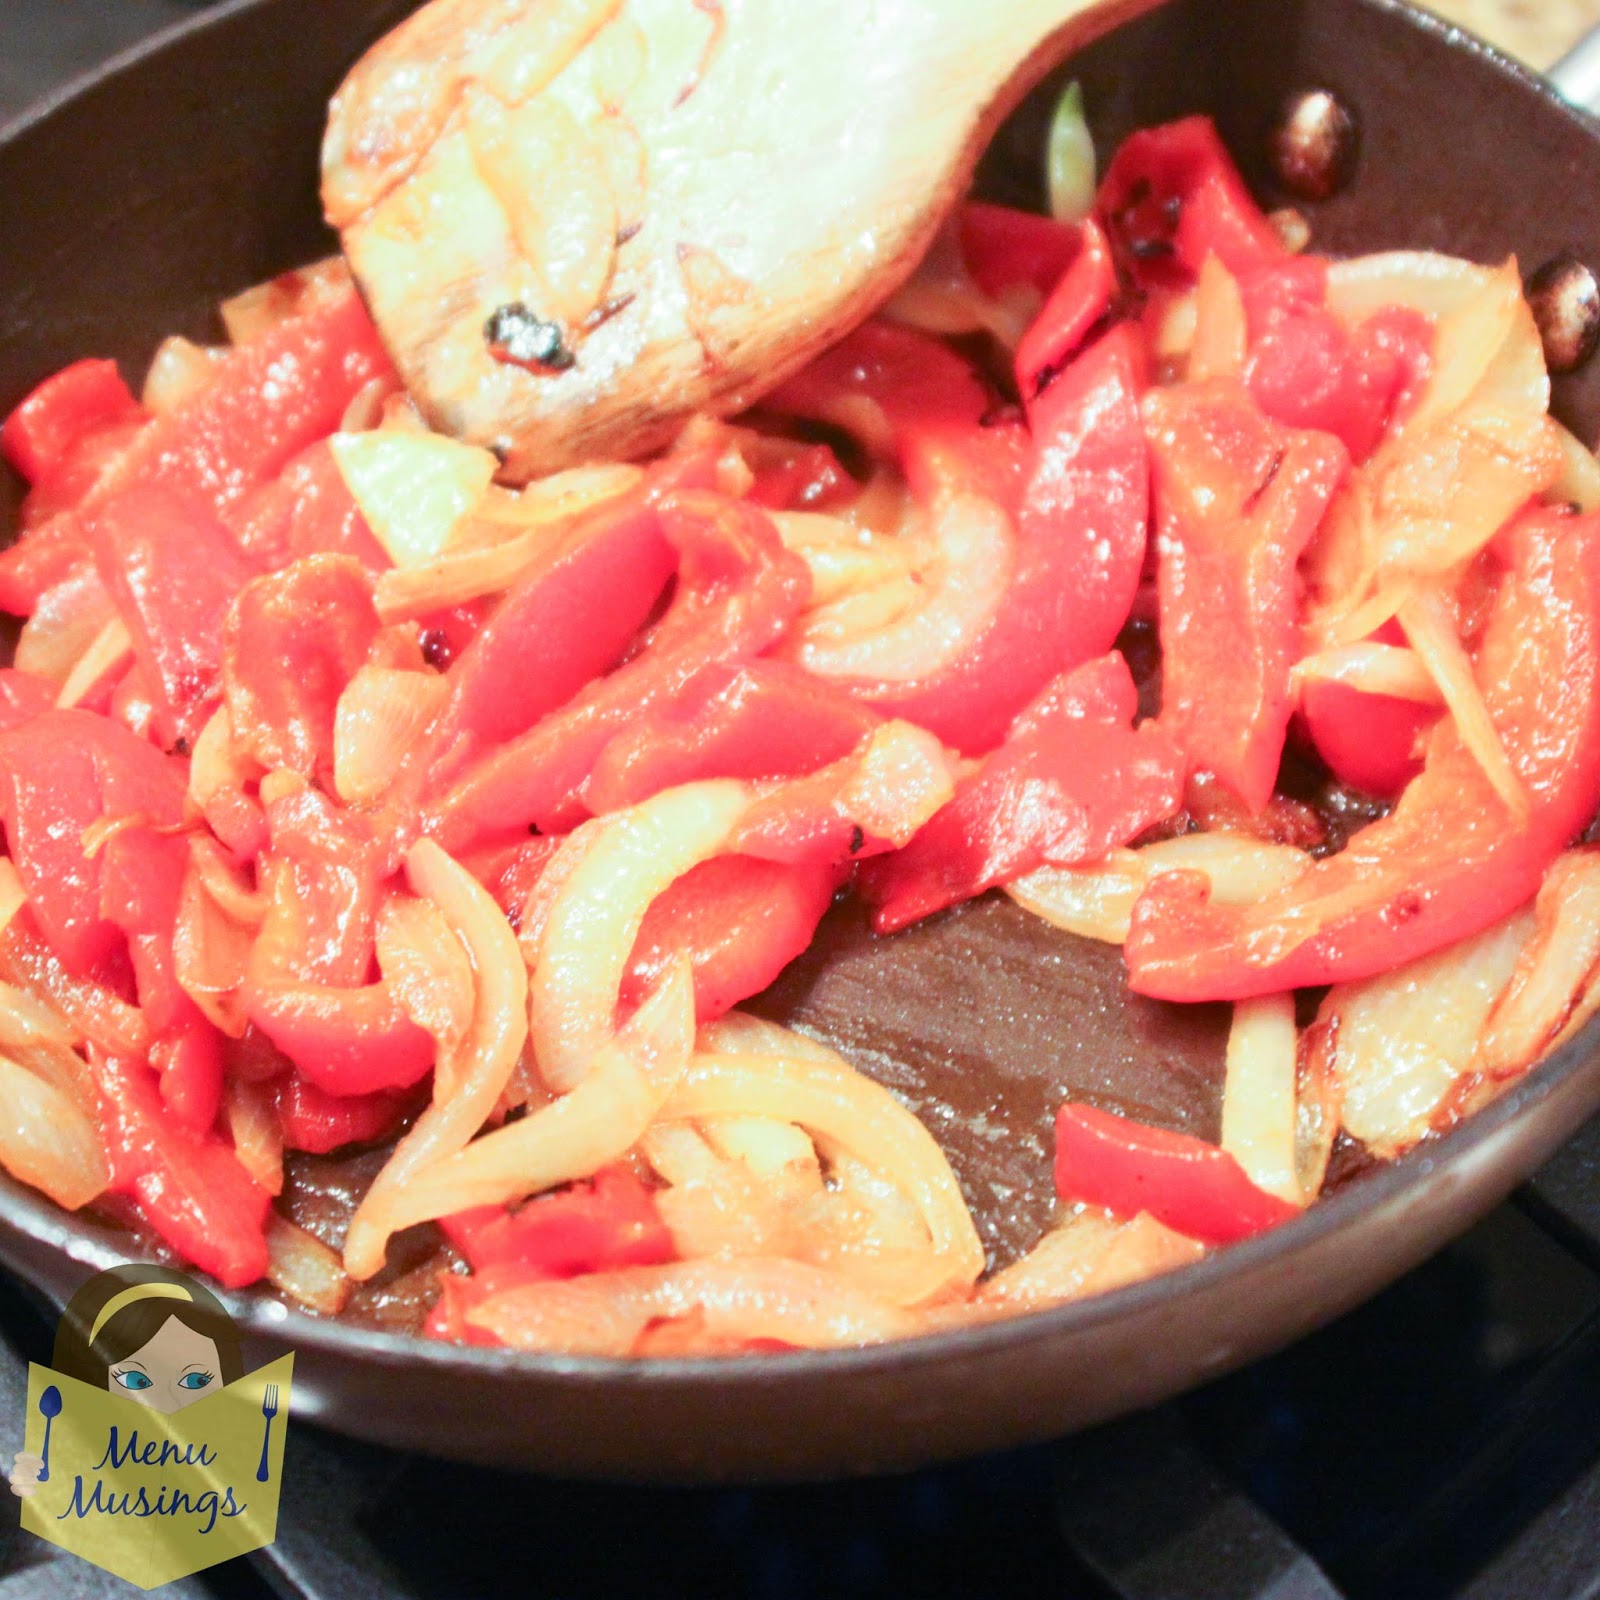
Saute the onions and red bell peppers.
You can save some time by using roasted red peppers from a jar. TaDA!! After your onions are mostly cooked down, add them together and let them finish heating up and caramelizing.
On a screaming hot grill, remove the marinated flank steak from the chimichurri and grill on both sides until you achieve your desired level of doneness. My husband grilled ours, and we generally prefer a medium amount of doneness on ours. When you take your steak off the grill, you will want to let it rest several minutes. This will give you an opportunity to start assembling your salad.
Let them REST!
Assemble your salad as you wish, but I started with a bed of romaine lettuce, shredded pepper jack cheese, grilled onions and peppers, your thin slices of grilled beef, some of that beautiful black bean and corn salsa, and finally - the creamy peppercorn vinaigrette.
With flank steak or skirt steak, it is very important that you cut very THIN strips of meat, and that you cut them AGAINST the grain of the beef. If the meat is running top to bottom, you want to cut left to right. If you cut in the same direction as the meat is running, you will probably not be able to chew it! Also, I recommend that you not cut with your knife straight up and down, but at about a 45 degree angle. You want the fibers of the meat to be very short. This is an inexpensive, tough cut of beef that we are trying to trick into being tender. :)
THAT, my friends, is ONE HECK of a salad! We've got crunch, creamy, smooth, smoky, sweet, oh my!! This one will never be considered "rabbit food" by any one's stretch of the imagination.
Food Nerd Notes - Chimichurri.
Chimichurri is one of the most delicious and most versatile sauces around. It is an sauce or condiment of Argentinean origin similar to pesto that is similar throughout South America. The basic version uses fresh parley (although cilantro is often found as well), oregano, garlic, oil and vinegar and a little bit of chili pepper, though the variations on the theme are endless. In Argentina it is used both as a marinade and a sauce for grilled steak, but can be used with fish, chicken or even pasta. The flavor has been described as "like running your steak through a fresh garden" and is absolutely delightful.
I hope you enjoyed this amazingly delicious recipe!
There are hundreds more in my Recipe Index, just waiting to be chosen and cooked! You can also visit my Film strips for pinning page, to see whole recipes at a glance, and to click-and-go right to the recipe.
The Menu Musings cookbook is sure to be a hit at your house, and make great gifts all year long! For more information, here is a link!
If you are new to MenuMusings, click here to subscribe so you won't miss a thing! I'll send you notifications of new posts to help you avoid that proverbial cooking rut. You can also follow me on Pinterestand on the MenuMusings facebookpage.
Add everything to a food processor or blender and combine. You can make this ahead of time and have it ready in the refrigerator.
Chimichurri -
We are going to use this Argentinean "sauce" as a marinade for our beef. The directions are the same as the vinaigrette. Add everything to a blender and give it whirl until it is combined to your satisfaction. If you aren't a cilantro fan, feel free to use all parsley rather than half and half cilantro and parsley.
Marinate the flank steak in the chimichurri in a ziptop bag for at least an hour or so. You can definitely leave it in there for more. Add the chimichurri sauce to your flank steak to get this party started. The great part about putting it in a zip top bag is that it's easier to ensure it is contact with all the meat at the same time. And then when you're done, you just toss it out! You'll want to make sure you squish out all the excess air from the bag before putting it in the fridge. Just throw it somewhere in the fridge.
For the salad -
Make a quick black bean and corn salsa. (Follow the link provided.) This one is also best if you do it ahead of time, which would be a time saver for you when it comes time to put dinner together.
Saute the onions and red bell peppers. You can save some time by using roasted red peppers from a jar. After your onions are mostly cooked down, add them together and let them finish heating up and caramelizing.
On a screaming hot grill, remove the marinated flank steak from the chimichurri and grill on both sides until you achieve your desired level of doneness. We generally prefer a medium amount of doneness. When you take your steak off the grill, you will want to let it rest several minutes. This will give you an opportunity to start assembling your salad.
Assemble your salad as you wish, but I started with a bed of romaine lettuce, shredded pepper jack cheese, grilled onions and peppers, your thin slices of grilled beef, some of that beautiful black bean and corn salsa, and finally - the creamy peppercorn vinaigrette.
With flank steak or skirt steak, it is very important that you cut very THIN strips of meat, and that you cut them AGAINST the grain of the beef. If the meat is running top to bottom, you want to cut left to right. If you cut in the same direction as the meat is running, you will probably not be able to chew it! Also, I recommend that you not cut with your knife straight up and down, but at about a 45 degree angle. You want the fibers of the meat to be very short. This is an inexpensive, tough cut of beef that we are trying to trick into being tender. :)
THAT, my friends, is ONE HECK of a salad! We've got crunch, creamy, smooth, smoky, sweet, oh my!! This one will never be considered "rabbit food" by any one's stretch of the imagination.


.jpg)
.jpg)
.jpg)
.jpg)
.jpg)
.jpg)
.jpg)
.jpg)
.jpg)
.jpg)
.jpg)
.jpg)
.jpg)
.jpg)
.jpg)
.jpg)
.jpg)
.jpg)
.jpg)
.jpg)
.jpg)
.jpg)
.jpg)
.jpg)
.jpg)
.jpg)
.jpg)
.jpg)
.jpg)
.jpg)
.jpg)
.jpg)
.jpg)
.jpg)
.jpg)
.jpg)
.jpg)
.jpg)

.jpg)
.jpg)
.jpg)


