Okay, so this is a horrible name for a post; but how else could I convey what in the heck I was trying to explain?! First of all, school for most folks has started back; and if it hasn't, you are probably in a mad dash to get things done before it does. Secondly, we are all so dang busy, that it's sometimes really hard to get a good a good breakfast for yourself and your people! Thirdly, some of you live alone and don't really want to mess up the whole kitchen every time you want something to eat. Well this recipe is perfect for all of those things. I figured out that it doesn't take any longer to make the batter for 8-9 pieces of french toast than it does for 2-3, so I may as well spend a little extra time on a day when I do have a little more time and make a large batch.
My kids have lovingly agreed on several occasions to be the guinea pigs for this experiment, and have gleefully agreed that the toasted, frozen french toasts taste nice and fresh. We tried this a few times over the summer in preparation for the busy school year ahead. We thought this would be a great "grab-n-go" toaster breakfast if everyone got in a time pinch. You should probably know that they have tried the commercially prepared frozen french toast and turned their noses up at them. Sure, they were convenient, but since I've made theirs fresh their whole lives... I guess those just didn't measure up. (giggle)
Ingredients: (8-9 pieces of french toast)
- 8-9 pieces sliced whole wheat bread
- or bread of your choosing
- 4 large eggs
- 1/2 cup sugar
- 1 - 1 1/2 cup or so of milk
- A splash of good quality vanilla
- I use clear Mexican vanilla
- Lots of good quality ground cinnamon
Extra stuff:
- non-stick cooking spray
- cooling rack
- waxed paper
- zip top bag and sharpie permanent markers
*my recipe is pretty touchy feely. Feel free to add more or less of whatever you'd like. If you have a favorite recipe for this, by all means use it. I am really passing along the concept of what I'm doing with the french toast.
Step-by-step:
With the exception of the bread, obviously, add all of the custard ingredients in a shallow bowl. I typically use a pie plate, but whatever works best for you is fine.
 |
| 4 large eggs |
 |
1 - 1 1/2 cups milk (I'm sorry, I never really measure)
*I'm using 2% milk. You can make this more or less rich depending on the fat you use in milk. |
 |
1/2 cup sugar
These aren't super sweet, but they are sweet enough that if you had to take them "on the run," you wouldn't need anything extra on them. Feel free to play around with the level of sweetness. |
 |
| A nice splash of good quality vanilla. I like the clear Mexican vanilla. |
 |
| LOTS of cinnamon |
Whisk thoroughly to really break up the egg. If a fork works better for you than a whisk, try that. If there are still clear pieces of egg white, they will show up on your toast.
Kids don't like that.
 |
| Whisk thoroughly! |
Spray your pan with non-stick cooking spray. I'm using a non-stick skillet today. I find that to be easiest (especially when my little girl is helping me cook).
 |
| Non-stick cooking spray |
Immerse both sides of bread into the batter until wet but not too soggy. Add to skillet. Depending on the size of the skillet, you can do multiples. Cook on medium heat until medium - medium golden brown. They will cook a little more in the toaster at the end.
Allow them to cool on a cooling rack so that air can circulate both over and under them. Don't be surprised that you only end up with a few at the end, but that's part of it. *These also make great snacks. Try them with a bit of peanut butter.
 |
| Somehow I never end up with 8-9. I may have a thief lurking somewhere! |
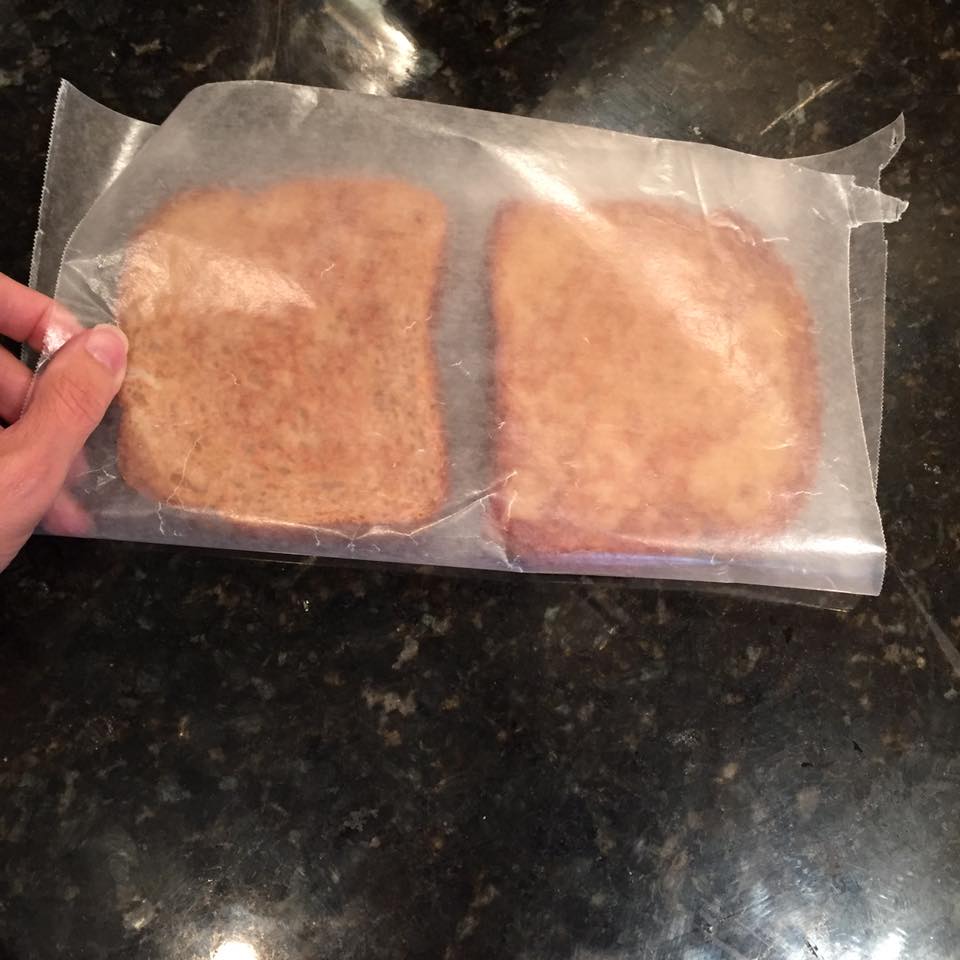
After they are cool (read as: you've cleaned up the kitchen, fed the dog, made the beds, etc.), you can package up the leftover ones in the freezer for a day when you perhaps don't have time to make a hot breakfast. Grab a piece of parchment or waxed paper. I'll show you how I used one piece to wrap up to five pieces at once. We want to do this so they won't stick together.
 |
| Two pieces side-by-side |
 |
| Fold it over |
 |
| Add a piece in the middle. That makes three. |
 |
| Now you can add one piece on each side. So you can separate up to FIVE pieces of french toast with one piece of paper! |
Now just label your zip top bag and pop them in the freezer.
 |
| PLEASE date and label everything that goes into your freezer! |
 |
| In they go! |
Now on a busy day, let's give this a try! You can see that they are fully frozen.
 |
| Remove frozen french toasts. |
Pop them into the toaster. Be aware, they may take two cycles. (But I'm like that with everything. I want my stuff hot, y'all!) This gives you time to grab some fruit and make some bacon. Or at least tie somebody's tennis shoes and find a backpack, right?
 |
| Pop them into the toaster. |
This is what they look like naked out of the toaster. Good as new.
Now if you really want to act like you just made them (I mean, you don't have to
tell anybody that you just took them out of the toaster)... make them all pretty! Voila!
I hope you enjoyed this recipe! Here are some others I think you'll like:
Spicy Sweet Potato Hash - A great, healthy breakfast to fuel up for your day! #paleo #glutenfree
Short Cut Chicken Gnocchi Soup - Better than the one at Olive Garden, and you know what's in there! So easy and comforting! #familyfavorite #easyrecipe
BLT Buffalo Chicken Wraps - What to do with those leftover chicken tenders your kids bring home!
#recipehack #brownbaglunch #easyrecipe
Thai Chicken Salad Wraps/Cones - when you want something different but healthy for lunch!
#easyrecipe #healthylunch #brownbaglunch
Creamy Chicken Piccata - so easy to make at home, why wait until you go out for this?
#familyfavorite #easyitalian #dinnerpartyworthy
To order the Menu Musings Cookbook, or just to get more information about it, click the link.
**If you know a kiddo going off to college and moving to an apartment of their own, this makes a great gift! The same thing goes for newlyweds!
Written Method:
With the exception of the bread, obviously, add all of the custard ingredients in a shallow bowl. I typically use a pie plate, but whatever works best for you is fine. Whisk thoroughly to really break up the egg. If a fork works better for you than a whisk, try that. If there are still clear pieces of egg white, they will show up on your toast. Kids don't like that.
Spray your pan with non-stick cooking spray. I'm using a non-stick skillet today. I find that to be easiest (especially when my little girl is helping me cook).
Immerse both sides of bread into the batter until wet but not too soggy. Add to skillet. Depending on the size of the skillet, you can do multiples. Cook until medium - medium golden. They will cook a little more in the toaster at the end.
Allow them to cool on a cooling rack so that air can circulate both over and under them. Don't be surprised that you only end up with a few at the end, but that's part of it. *These also make great snacks. Try them with a bit of peanut butter.
After they are cool (read as: you've cleaned up the kitchen, fed the dog, made the beds, etc.), you can package up the leftover ones in the freezer for a day when you perhaps don't have time to make a hot breakfast. Grab a piece of parchment or waxed paper. I'll show you how I used one piece to wrap 4-5 pieces at once.
Now just label your zip top bag and pop them in the freezer.
Okay, let's see how well these frozen ones turned out.
Pop them into the toaster. Be aware, they may take two cycles. (But I'm like that with everything. I want my stuff hot, y'all!) This gives you time to grab some fruit and make some bacon. Or at least tie somebody's tennis shoes and find a backpack, right?
This is what they look like naked out of the toaster. Good as new.
Now if you really want to act like you just made them (I mean, you don't have to tell anybody that you just took them out of the toaster)... make them all pretty! Voila!

 My husband suggested that I bring them home and "figure it out." Ha! This is when you start looking in the mirror. We all love roasted vegetables, and I read of someone else roasting okra (which removes the sliminess), so I decided to give it a shot. To give them a fighting chance with the kiddos, I knew they'd better have lots of flavor, so I mixed up a seasoning blend. And you know what? EVERYone ate them! YAY! Success!!!