Somehow I always end up getting signed up as snack helper during the first week of school. But really, that works out okay for me because classes haven't started back for me yet at the university so that makes it a little easier; and also, it gives the kids an opportunity to be the classroom helper for the day, which I think is a good ice breaker for them. Our schools really prefer that we send healthy snacks for the kids, and you know that I'm on board with that, so these cute little butterfly snack bags are what we chose to make for "round 1" of snack helper. FYI - This academic year, I'll have kids in the 11th, 9th, 1st, and kindergarten! Lord have mercy on me!
These snack bags give the students a balanced and healthy snack of fruit, cheese, and crackers. It's not messy, and very kid friendly! I'm hoping that the bright colors and the cute packaging will make it even more fun to eat.
There's not really a recipe, as you could put whatever you wanted to in them. Here's what I used:
Ingredients:
Red and green seedless grapes
Multicolored goldfish snack crackers
Individually wrapped string cheese
Craft supplies
Snack sized zip top bags
Wooden clothespins
Fuzzy pipe cleaners, cut in half
Googly eyes
Glue (like Elmer's)
Step-by-Step:
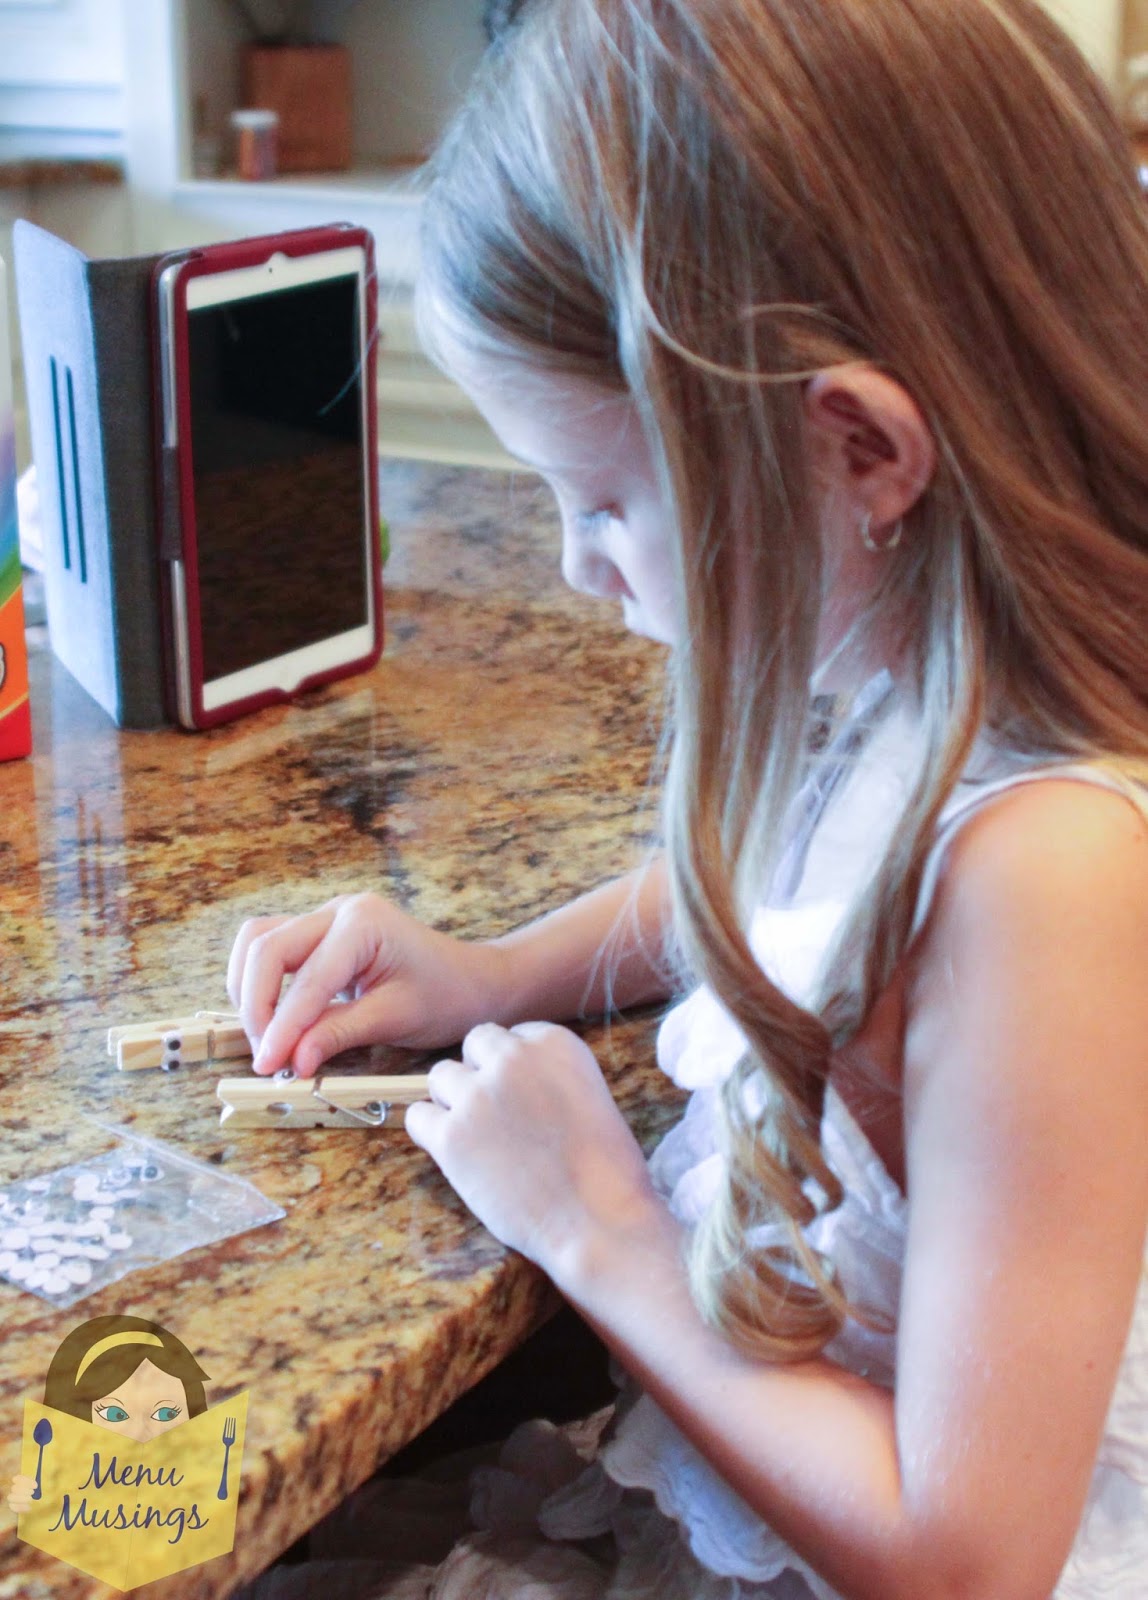
By all means, if your young elementary-aged child, or even preschooler is making these for their class, please enlist their help. So many elements of this project is beneficial to them. Even if it is just sorting or counting out the grapes for the bags - it's all part of the learning process.
I recommend gluing the googly eyes onto the clothespin first, so they will have time to dry.
We found that 10 - 11 grapes worked best in each bag, depending on the size.
Add a small handful of goldfish to the other side of the bag. Pinch the bag together in the middle to keep the contents separate with the clothespin. Cut a pipe cleaner in half and fold it into antennae. Place the antennae into the "mouth" of the clip.
I used Elmer's Glue-All on the rounded side of the string cheese so that it would rest on the flat side for more stability.
Press the butterfly firmly down onto the glue and set somewhere to dry for a while, like on a large cookie sheet.
And then you have these cute little guys!
...Who sort of multiply into a whole happy little butterfly colony!
I have them all on cookie sheets, as I mentioned, so that I can pop then back into the refrigerator while the glue is drying. This is where they will stay until we are ready to bring them to school.
Some other things you could fill them with? Hmmmm.... raisins, trail mix, granola, nuts, berries, dried fruit, dry cereal, mini pepperonis. I guess your imagination is the only limit.
You'll notice that the top of the cheese in the photos is nice and round. This is where the package has a split for easy opening. It thought it looked too tall, so I folded it back and just taped it down. That's optional, but I just wanted you to know what I did for the sake of clarity. There are also other varieties of individually wrapped cheeses available (cheddar, cheddar/jack, etc). But string cheese is very mild, and pretty well accepted by lots of kiddos. It's fun to eat because it pulls apart into "strings," hence the name, and tastes similar to mozzarella.
Looking for more healthy snacks for kids? Check out this wonderful resource -
I hope you enjoyed this simple and healthy snack idea!
There are hundreds more recipes in my Recipe Index,
just waiting to be chosen and cooked! You can also visit my Film strips for pinning page, to see whole recipes at a glance, and to click-and-go right to the recipe.
The Menu Musings cookbook is sure to be a hit at your house, and will make great gifts! For more information, here is a link!
If you are new to MenuMusings, click here to subscribe
so you won't miss a thing! I'll send you notifications of new posts to
help you avoid that proverbial cooking rut. You can also follow me on Pinterestand on the MenuMusings facebookpage.
Also, Please be sure to visit my YouTube Channel
for short video tutorials on selected videos. Watch me explain the
steps of the recipes in just a few minutes! Just one more way that I'm
giving you the tools to get in that kitchen!!! Aren't you curious? Click and see how many there are! :)
Here's just one example - Stuffed Zucchini. Yum!!!
According to food historians, our modern carrot cake most likely descended from
the carrot puddings enjoyed by the Europeans during the Medieval times, and from there, evolved into what we now enjoy. At the time, sugar and
other sweeteners were scarce or expensive. Carrots, however, contain more sugar than any other vegetable besides the sugar beet, and were easy to come by, so they were used all over Great Britain and Europe as a sugar substitute in sweet desserts. It is believed that the popularity of carrot cake was revived in Britain due to the rationing of sugar once again during the Second World War.
As many of you can attest to, carrot cake is usually denser than a traditional cake and is expected to have a coarser crumb. One look at the photo of this one will tell you that this recipe is anything BUT dense. Oh MY GOSH.... it was SO tender and moist! I would LOVE to take the credit for this recipe, but I really can't. It's pretty much the way my mom does it. Yep. Go ahead and shake your head. I had some at her house recently, and it was of one of those "Oh my GOD, I have GOT to make this!" moments. And then out of the blue, my 6 year old son tells me, "Mom, did you know that I really like carrot cake?" So of course that was pretty much the 1 - 2 knock out punch. Game on!
1 (16 oz) pkg + 1 1/2 cup extra confectioners' sugar
1 tsp good quality vanilla
1/2 tsp almond extract
1 - 2 cups chopped pecan pieces
(optional for garnish)
Step-by-Step:
Preheat oven to 350 degrees F. Prepare three, 9" cake pans with nonstick cooking spray and granulated sugar (or flour) to cover. Next cut out parchment paper circles (for extra insurance), and fit the circles in the bottom of the pans. This will ensure that the cakes will not stick to the pans. No way do I want to do all this work just to let my cakes stick! No way, Jose!!! Plus, this is always a step that my kiddos like to do while I'm getting everything else started.
Cooking spray + granulated sugar
Canon is cutting out parchment circles after tracing around the cake pans
Nope. It doesn't matter if they are "perfect." Just let the kids help. You'll be glad you did. :)
Now the next big thing is to prep all the ingredients. Go ahead and take the 4 eggs out so they can come to room temperature. I have professional "egg cracker" always at the ready for this job!
Let's start grating those carrots. You do NOT want to use pre-grated carrots. They are too heavy, too dense, and too dry for this recipe. They will just fall to the bottom of the batter. You also do not want to put them in the food processor, as this will make them too wet. For this, my friends, you need to go old school and pull out the hand grater. Luckily, I have the perfect little volunteers who were just itching to do this job! Now I'm sure you are aware that hand graters come in various sizes for the actual grating. We want finely grated carrots for this recipe. That means, use your fine grater. Yes, I'm aware that one takes longer. But these will just about melt into the batter and be so tender that you will thank me!
3 cups of finely grated carrots equates to roughly about a pound of carrots
Alright... ready? Well here we go! Combine the first 7 ingredients. I suggest doing this in a stand mixer, as this makes a pretty stiff batter at the beginning.
3 cups finely shredded carrots
2 cups cake flour (I used Swans Down)
1 tsp baking powder. My children loved that the baking powder can came with its own self leveling device, in that there is a straight edge built in. They thought that was the absolute coolest thing!
1/2 tsp salt + 2 tsp baking soda
2 cups granulated sugar
1 tsp ground cinnamon
Combine all those ingredients first. It may seem pretty stiff with all the carrots. Next, stir in the beaten eggs, oil, and vanilla. Mixing well.
4 eggs, well beaten
Okay... don't have a fit about this! This makes the cake so moist and keeps it from being so dense and "packy" like most carrot cakes. Don't over-think it. It's a 3-layer cake, for Pete's sake!
1 3/4 cup canola oil
1 tsp good quality vanilla (I'm channeling Ina Garten when I say that.) :)
Now we are going to load it up with extra goodies!
1/2 cup shredded, sweetened coconut
1/2 cup crushed, canned pineapple (I semi-drained it against the side of the can. Not completely.)
Mix well to incorporate, then pour the batter into the 3 prepared (greased and floured) 9-inch round cake pans that we fit the parchment rounds into.
Bake at 350 degrees F for 30 minutes or until a toothpick comes out clean when inserted into the middle. You should also see the cake pulling away from the sides of the pan slightly. Cool the cakes in the pans for about 10 minutes on wire cooling racks. Then run a knife around the edges, invert onto a cooling rack, and allow to cool completely before you try to frost them. You need some time to make the frosting anyway, right?
Can you see how nicely the parchment peels off of the bottom? There's nothing like doing all that work, and then having a big chunk of cake stick to the bottom. That will definitely put a damper on your day!
Let's make the cream cheese frosting now, while we wait for the cake layers to cool.
Combine the cream cheese and butter, beating until smooth. Add the powdered sugar, vanilla, almond extract, and beat until light and fluffy. This will take a WHILE! The cream cheese has to soften and heat up before it will allow itself to aerate and get fluffy and expand. It will like.... double... but only if you give it ample TIME... like about TEN MINUTES in the stand mixer! So be patient. This is not my strong suit. So be prepared. I told you so.
The butter will soften better if cut into Tbsp first. And this is also an opportunity to work on counting and equal portions.
12 Tbsp butter, softened
1 (8oz) pkg cream cheese
1 tsp vanilla
1/2 tsp almond extract
1 (16oz) pkg + 1 1/2 cup extra confectioners' sugar Preferably sifted. I didn't sift mine, and I had some lumps. Do take the time to sift!
You should also take the time to do a quick taste test. Yum!
Now when your cakes are completely cool, we are ready to ice the cake. This will be a 3 layer cake. Well, duhh. You knew that, right? To avoid having the frosting all over my cake pedestal, we cut up some parchment into some quasi triangular pieces. This will allow them to slip out easily afterwards. Spread frosting between each other layers, then the top, then the sides.
Now add about a cup or so of pecan pieces (really however many your heart desires) to the frosting. If you don't like nuts, or if someone has a nut allergy, leave them off.
Gently remove the "slices" of parchment paper.
And serve it to some people you adore!
Just look at the delicate crumb of this cake! There is NOTHING dense about this cake at all!
But here's what you have to be careful of (especially when there are sneaky grandparents and grandchildren all together!) .... I think you may have to agree that a cake such as this can be awfully hard to resist. So when you have your nice shot all set up... and you turn around... and turn back again.... you may see something like this -
(Just when you thought they were all out on the lake tubing!)
"Oh Mom, were you still using that cake?"
Now look at Papa coming in for a bite, too! Okay, this photo shoot is officially OVER! LOL!!
I hope you enjoyed this amazingly delicious recipe!
There are hundreds more in my Recipe Index,
just waiting to be chosen and cooked! You can also visit my Film strips for pinning page, to see whole recipes at a glance, and to click-and-go right to the recipe.
The Menu Musings cookbook is sure to be a hit at your house, and will make great gifts! For more information, here is a link!
If you are new to MenuMusings, click here to subscribe
so you won't miss a thing! I'll send you notifications of new posts to
help you avoid that proverbial cooking rut. You can also follow me on Pinterestand on the MenuMusings facebookpage.
Also, Please be sure to visit myYouTube Channelfor short video tutorials on selected videos. Watch me explain the
steps of the recipes in just a few minutes! Just one more way that I'm
giving you the tools to get in that kitchen!!! Aren't you curious? Click and see how many there are! :)
Here's just one delicious example - Thai Coconut Lime Chicken! (just click to watch)
Preheat
oven to 350 degrees F. Prepare three, 9" cake pans with nonstick
cooking spray and granulated sugar (or flour) to cover. Next cut out
parchment paper circles (for extra insurance), and fit the circles in
the bottom of the pans. This will ensure that the cakes will not stick
to the pans. Go ahead and take the 4 eggs out
so they can come to room temperature.
Let's
start grating those carrots. You do NOT want to use pre-grated
carrots. They are too heavy, too dense, and too dry for this recipe.
They will just fall to the bottom of the batter. You also do not want
to put them in the food processor, as this will make them too wet. For
this, my friends, you need to go old school and pull out the hand
grater. Now I'm sure you are aware that hand graters
come in various sizes for the actual grating. We want finely grated carrots
for this recipe. That means, use your fine grater. Yes, I'm aware
that one takes longer. But these will just about melt into the batter
and be so tender that you will thank me!
Combine the
first 7 ingredients. I suggest doing this in a stand mixer, as this
makes a pretty stiff batter at the beginning. Combine all those ingredients first. It may seem
pretty stiff with all the carrots. Next, stir in the beaten eggs, oil,
and vanilla. Mixing well. Now load it up with the extra goodies - the coconut and semi-drained pineapple. Mix well to incorporate, then pour the batter into
the 3 prepared (greased and floured) 9-inch round cake pans that we fit
the parchment rounds into.
Bake
at 350 degrees F for 30 minutes or until a toothpick comes out clean
when inserted into the middle. You should also see the cake pulling
away from the sides of the pan slightly. Cool the cakes in the pans for
about 10 minutes on wire cooling racks. Then run a knife around the
edges, invert onto a cooling rack, and allow to cool completely before
you try to frost them.
Make the cream cheese frosting while you wait for the cake layers to cool. Combine
the cream cheese and butter, beating until smooth. Add the powdered
sugar, vanilla, almond extract, and beat until light and fluffy. This
will take a WHILE! The cream cheese has to soften and heat up before it
will allow itself to aerate and get fluffy and expand. It will
like.... double... but only if you give it ample TIME... like about TEN
MINUTES in the stand mixer! So be patient. This is not my strong
suit. So be prepared. I told you so.
Spread frosting between each other layers, then the
top, then the sides. Add about a cup or so of pecan pieces (really however many your heart
desires) to the frosting. If you don't like nuts, or if someone has a
nut allergy, leave them off. Gently remove the "slices" of parchment paper. Serve it to some people you adore!

.jpg)
.jpg) These snack bags give the students a balanced and healthy snack of fruit, cheese, and crackers. It's not messy, and very kid friendly! I'm hoping that the bright colors and the cute packaging will make it even more fun to eat.
These snack bags give the students a balanced and healthy snack of fruit, cheese, and crackers. It's not messy, and very kid friendly! I'm hoping that the bright colors and the cute packaging will make it even more fun to eat. .jpg)
.jpg)
.jpg)

.jpg)
.jpg)
.jpg)
.jpg)
.jpg)
.jpg)
.jpg)

.jpg)


.jpg)


.jpg)
.jpg)

.jpg)
.jpg)
.jpg)
.jpg)
.jpg)
.jpg)
.jpg)
.jpg)
.jpg)
.jpg)
.jpg)
.jpg)
.jpg)
.jpg)
.jpg)
.jpg)
.jpg)
.jpg)
.jpg)
.jpg)
.jpg)
.jpg)
.jpg)
.jpg)
.jpg)
.jpg)
.jpg)
.jpg)
.jpg)


.jpg)
.jpg)
.jpg)
.jpg)
.jpg)
.jpg)
.jpg)
.jpg)
.jpg)
.jpg)
.jpg)

.jpg)
.jpg)


