Showing posts with label Tex-mex. Show all posts

Friday, January 23, 2015

Southwestern Beef Salad with Creamy Peppercorn Ranch

Okay, now THIS was a shock to me.... This creamy peppercorn vinaigrette was a big hit at our house! I really thought that the majority of my family would be reaching for the standard ranch dressing, and that I was making this for myself; but as it turned out, even the kids loved it!  Whaaat?!  My six year old said "Oh mom, I LOVE this new ranch dressing you made!"  HaHa.... Well... Ummmm... Okay! Let's just go with that!  And the best part is that all you have to do is throw the ingredients together in a food processor or blender and give it a whirl until its all combined.  You probably have all these things in the refrigerator already.  After that, you can refrigerate it (covered) for about a week and it's still mighty delicious.  :)

My friend Barb was going out for her birthday a while back and we were discussing the restaurant.  I looked up the menu and saw a salad similar to this calling out my name from like 900 miles away. That didn't seem to be a viable option for me, so I set about the business of creating my own version. I love a good hearty hearty salad with a mix of lean proteins and lots of different flavors and textures. I get that trait from my mother, who is the best salad maker ever.  If you aren't a big salad fan, the marinated beef can be made into quesadillas (that's what my kids had), tacos or nachos, and the dressing can be used for as many things as you can dream up. 

What's great about this salad, is that it lends itself SO WELL to making up all the components ahead of time, and then putting them all together when you are ready for a pretty quick dinner.  


Ingredients:  

Creamy peppercorn ranch
  • 1/2 c mayonnaise
  • 1/2 c sour cream
  • 1/3 c freshly grated Parmigiano reggiano
  • 2 Tbsp freshly squeezed lemon juice
    • ~ 1 medium lemon
  • 2 Tbsp milk (full fat)
  • 2 tsp freshly ground black pepper
  • 2 medium garlic cloves, rough chopped
  • 1/2 tsp kosher salt
Southwestern beef salad 
  • grilled, chimichurri marinated flank steak (or skirt steak)
  • black bean and corn salsa (follow link)
  • grated pepper jack cheese
  • roasted red pepper peppers and onions 
  • creamy peppercorn vinaigrette 
  • Romaine salad blend
Argentinean chimichurri sauce* (see food nerd notes)
  • 1/2 bunch cilantro
  • 1/2 bunch parsley
  • 6 - 8 cloves garlic
  • 3/4 c extra virgin olive oil
  • 1/4 c red wine vinegar
  • juice from 1/2 of 1 large lime
  • 2 Tbsp diced red onion
  • 1 tsp black pepper
  • 1 tsp kosher salt
  • 1/4 tsp red pepper flakes
Step-by-Step:
Ranch - 
Add everything to a food processor or blender and combine.  You can make this ahead of time and have it ready in the refrigerator.
1/2 cup mayonnaise
1/2 cup sour cream
1/3 c freshly grated Parmigiano reggiano
 2 Tbsp freshly squeezed lemon juice 
 2 Tbsp milk (full fat) 
 2 tsp freshly ground black pepper 
2 medium garlic cloves, rough chopped
1/2 tsp kosher salt
 Mix to combine.
And here it is!  So creamy... All you need is a lovely veggie tray and you could be all set for dipping!
Chimichurri - 
We are going to use this Argentinean "sauce" as a marinade for our beef.   The directions are the same as the vinaigrette.  Add everything to a blender and give it whirl until it is combined to your satisfaction.

If you aren't a cilantro fan, feel free to use all parsley rather than half and half cilantro and parsley.
1/2 bunch cilantro 
6 - 8 cloves garlic
(oops!  Forgot to photograph.... 1/2 bunch parsley as well as cilantro)
 2 Tbsp diced red onion 
You will get more juice from that lime if you heat it up first in the microwave for about 15 seconds and then roll it under firm pressure on cabinet before cutting it.
juice from 1/2 of 1 large lime
1/4 c red wine vinegar 
3/4 c extra virgin olive oil 
1  tsp kosher salt
1 tsp black pepper 
1/4 tsp red pepper flakes
Now blend.....
Note - If you are going to use the chimichurri as a condiment for your meat, and NOT a marinade, I would not blend it.  I would put it in a food processor and just pulse it until you get it to a sort of chunky salsa consistency.  But that was not my intended use here.  

Marinate the flank steak in the chimichurri in a ziptop bag for at least an hour or so.  You can definitely leave it in there for more.  Now just wait a second, dang it!  If I had intended upon someone coming in and picking up the camera, I would have at least NOT used a autumn leaves apron in the Winter! ... I could have at least made an attempt to MATCH or something!  ... but this is just a regular, after work day.  This is how we roll, folks!  :)
Add the chimichurri sauce to your flank steak to get this party started.  The great part about putting it in a zip top bag is that it's easier to ensure it is contact with all the meat at the same time.  And then when you're done, you just toss it out!
You'll want to make sure you squish out all the excess air from the bag before putting it in the fridge.
Here we go.  Just throw it somewhere in the fridge.  The other great thing about the bag is that is squishes in tight spots (as opposed to a bowl).
For the salad - 
Make a quick black bean and corn salsa.  Yum!  This is one of my favorite snacks... and it's super healthy!  Follow the link provided.  This one is also best if you do it ahead of time, which would be a time saver for you when it comes time to put dinner together. 

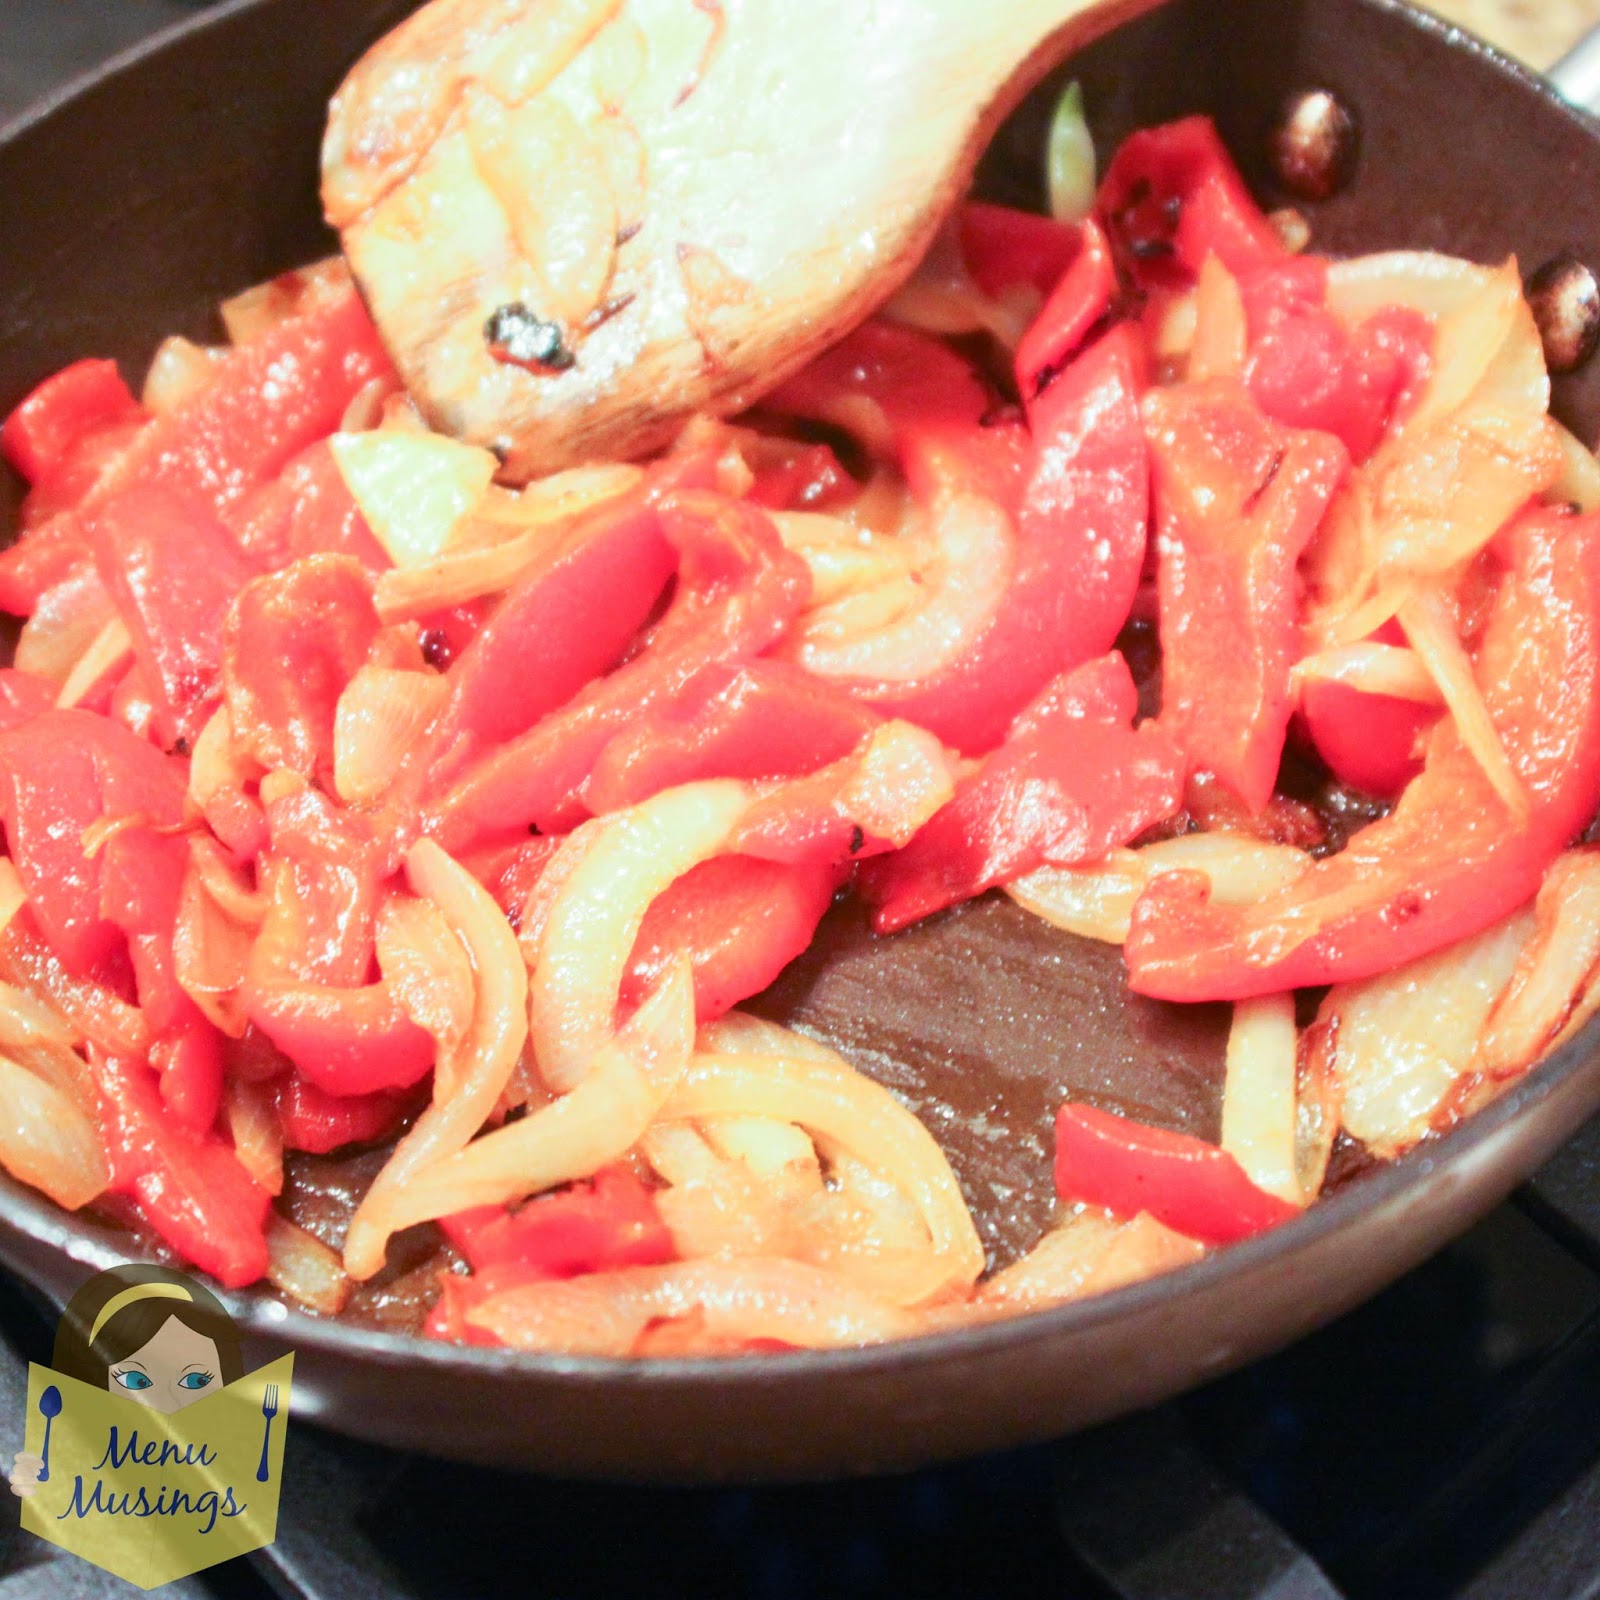
Saute the onions and red bell peppers.  
You can save some time by using roasted red peppers from a jar.  TaDA!!  After your onions are mostly cooked down, add them together and let them finish heating up and caramelizing.  
On a screaming hot grill, remove the marinated flank steak from the chimichurri and grill on both sides until you achieve your desired level of doneness.  My husband grilled ours, and we generally prefer a medium amount of doneness on ours.  When you take your steak off the grill, you will want to let it rest several minutes.  This will give you an opportunity to start assembling your salad.
Let them REST!
Assemble your salad as you wish, but I started with a bed of romaine lettuce, shredded pepper jack cheese, grilled onions and peppers, your thin slices of grilled beef, some of that beautiful black bean and corn salsa, and finally - the creamy peppercorn vinaigrette.  

With flank steak or skirt steak, it is very important that you cut very THIN strips of meat, and that you cut them AGAINST the grain of the beef.  If the meat is running top to bottom, you want to cut left to right.  If you cut in the same direction as the meat is running, you will probably not be able to chew it!  Also, I recommend that you not cut with your knife straight up and down, but at about a 45 degree angle.  You want the fibers of the meat to be very short.  This is an inexpensive, tough cut of beef that we are trying to trick into being tender.  :)

THAT, my friends, is ONE HECK of a salad!  We've got crunch, creamy, smooth, smoky, sweet, oh my!! This one will never be considered "rabbit food" by any one's stretch of the imagination.


Food Nerd Notes - Chimichurri.
Chimichurri is one of the most delicious and most versatile sauces around.  It is an sauce or condiment of Argentinean origin similar to pesto that is similar throughout South America.  The basic version uses fresh parley (although cilantro is often found as well), oregano, garlic, oil and vinegar and a little bit of chili pepper, though the variations on the theme are endless.  In Argentina it is used both as a marinade and a sauce for grilled steak, but can be used with fish, chicken or even pasta. The flavor has been described as "like running your steak through a fresh garden" and is absolutely delightful.


I hope you enjoyed this amazingly delicious recipe!
There are hundreds more in my Recipe Index, just waiting to be chosen and cooked!  You can also visit my Film strips for pinning page, to see whole recipes at a glance, and to click-and-go right to the recipe.

The Menu Musings cookbook is sure to be a hit at your house, and make great gifts all year long!  For more information, here is a link!

Connect with me.    
If you are new to MenuMusings, click here to subscribe so you won't miss a thing!  I'll send you notifications of new posts to help you avoid that proverbial cooking rut.  You can also follow me on Pinterest and on the MenuMusings facebook page.

You can also follow along to several Menu Musings recipes on YouTube with these short video tutorials.  Here's one example for Fire Roasted Corn Guacamole!  YUM!
Ranch - 
Add everything to a food processor or blender and combine.  You can make this ahead of time and have it ready in the refrigerator.

Chimichurri - 
We are going to use this Argentinean "sauce" as a marinade for our beef.   The directions are the same as the vinaigrette.  Add everything to a blender and give it whirl until it is combined to your satisfaction.  If you aren't a cilantro fan, feel free to use all parsley rather than half and half cilantro and parsley.


Marinate the flank steak in the chimichurri in a ziptop bag for at least an hour or so.  You can definitely leave it in there for more.  Add the chimichurri sauce to your flank steak to get this party started.  The great part about putting it in a zip top bag is that it's easier to ensure it is contact with all the meat at the same time.  And then when you're done, you just toss it out!  You'll want to make sure you squish out all the excess air from the bag before putting it in the fridge. Just throw it somewhere in the fridge.  

For the salad - 
Make a quick black bean and corn salsa.  (Follow the link provided.)  This one is also best if you do it ahead of time, which would be a time saver for you when it comes time to put dinner together. 

Saute the onions and red bell peppers.  You can save some time by using roasted red peppers from a jar.  After your onions are mostly cooked down, add them together and let them finish heating up and caramelizing.  

On a screaming hot grill, remove the marinated flank steak from the chimichurri and grill on both sides until you achieve your desired level of doneness.  We generally prefer a medium amount of doneness.  When you take your steak off the grill, you will want to let it rest several minutes.  This will give you an opportunity to start assembling your salad.

Assemble your salad as you wish, but I started with a bed of romaine lettuce, shredded pepper jack cheese, grilled onions and peppers, your thin slices of grilled beef, some of that beautiful black bean and corn salsa, and finally - the creamy peppercorn vinaigrette.  

With flank steak or skirt steak, it is very important that you cut very THIN strips of meat, and that you cut them AGAINST the grain of the beef.  If the meat is running top to bottom, you want to cut left to right.  If you cut in the same direction as the meat is running, you will probably not be able to chew it!  Also, I recommend that you not cut with your knife straight up and down, but at about a 45 degree angle.  You want the fibers of the meat to be very short.  This is an inexpensive, tough cut of beef that we are trying to trick into being tender.  :)

THAT, my friends, is ONE HECK of a salad!  We've got crunch, creamy, smooth, smoky, sweet, oh my!! This one will never be considered "rabbit food" by any one's stretch of the imagination.

Thursday, December 22, 2011

Chicken Monterrey

Your neighborhood Chili's restaurant most likely has a version of this dish.. maybe you've tried it?  Well this is the El-cheepo home version.  Much more economical (and yummy) than dressing everyone up, loading up, waiting for the water girl and the menu, and ultimately paying a hefty bill.  Don't get me wrong, I LOVE Chili's, but hey, money can be tight for most of us.  - and even if money is not the issue, having everyone cook, listen to music, and play with their own toys in your own house is so much more gratifying! ...and I dare say, you probably have most of the ingredients for this dish on hand in the pantry already!


Ingredients: 
  • 4 boneless, skinless chicken breasts 
  • 1/4 cup extra virgin olive oil
  • 2 Tbsp soy sauce
  • 2 tsp McCormick Montreal Chicken seasoning
    • or Steak seasoning
  • black pepper
  • 1/4 c. bar-b-que sauce 
    • I used Bull's Eye
  • 1/4 c. real bacon bits 
    • For convenience, I used the ones in the bag.  And they have a great smokey flavor, too.
  • 1 c. colby and jack cheese, shredded
  • 1 14 oz. can Rotel tomatoes (with green chilies added), drained
  • sliced green onions
Step-by-step:
Preheat oven to 400 degrees. 
Pound out chicken breasts to flatten evenly. You don't need them like a pancake.  Just even out the thickness* (see Food Nerd Notes at bottom)This will give you a much more even cooking time, since you won't have a fat (undercooked) end and a thin (overcooked) end.

Marinate the chicken for about 30 minutes in 1/4 cup extra virgin olive oil, 2 Tbsp soy sauce, 2 tsp McCormick Montreal Chicken (or Steak) Seasoning. Just fyi - If you leave the marinade on much longer than that, it can make the meat too salty.
Season with pepper.
1/4 cup EVOO, 2 Tbsp soy, 2 tsp Montreal seasoning.
Grill chicken until no longer pink.  Actually, the weather was terrible, so I just used my grill pan to do this on the stove top. By all means, use your outdoor grill if you prefer. You could also bake or pan saute the chicken, but esthetically, I think they look prettiest when they have the grill marks on them.  

One important thing to remember here, is that you are also going to finish the chicken off in the oven, so you don't need them to be 100% cooked yet.  You don't want to end up with overdone, dry chicken by the time you serve it. Remember that the internal temperature will continue to rise several degrees after you turn off the heat. The recommended cooking temperature for chicken breasts is 165 degrees F, so I turned off the heat at about 155 F, taking into account the continued temperature rise and the additional oven time coming up to finish off the dish.  One of the handiest things I have in my kitchen is a digital food thermometer.  I just stick it in the thicker area, set the target temperature, and go about my business until it starts beeping.  What a wonderful tool to take the guesswork out of something that can cause cooks so much anxiety. (A great idea for a "stocking stuffer," don't you think?)

But anyway, we digress.... now back to the chicken.
Top each chicken breast with one tablespoon barbecue sauce*, 1/4 c. shredded cheese, 1/4 c. drained Ro-tel tomatoes, chopped green onions and one tablespoon of bacon bits.
1/4 cup shredded cheese
*Option - I'm not the hugest fan of BBQ sauce, so I didn't add the sauce directly to the chicken. Instead, I "painted" it on the plate. But if you and your family enjoy it, add it to the chicken before the other toppings go on.
1/4 cup drained Ro-tel tomatoes
chopped green onions
To me, the nice thing about this recipe (versus the one at Chili's), is that you don't have a long strip of bacon that is hard to cut, and that pulls off the toppings when you attempt to do so.  Using the bacon pieces (whether the ones from the bag, or some crisp bacon that you have crumbled yourself) alleviates this issue.
1 Tbsp bacon bit
Place in oven and bake uncovered until cheese is melted (about 5 minutes). I just kept them on the grill pan and put the whole thing in the oven.

This picture is with the BBQ sauce on the plate.
This is how I actually prefer mine - with a dollop of sour cream.  

The end result is a tender, juicy chicken with a nice smokiness and southwestern flavor to it.

I hope you enjoyed this easy and delicious recipe!

Order the Menu Musings Cookbook!
 
Looking for more great recipes?  Feel free to browse through my Recipe Index for tons of ideas to make for your family... with step-by-step photos.

Here are a few bonus recipes to get you started:
Cajun Crawfish Bread

Stuffed Peppers

Mahogany Glazed Chicken

Cream Cheese Stuffed Pear Dumplings

Spinach and Apricot Stuffed Pork Tenderloin

Food Nerd Notes:
Why you should pound out the chicken breasts. Could it be that some of you are ignoring this step when you encounter this directive in a recipe? Don't. The technique is super easy, and there are several things you accomplish that you will like! Foremost, the first thing you accomplish when you pound out the chicken breast, is to make it thinner. This increases the surface areas allowing you to more thoroughly season/spice/bread the meat, helps tenderize the chicken, and gives you a faster cooking time.  As a sleight-of-hand, it also gives you the appearance of larger portions (since they will spread out).  This tricks you into thinking you are eating more than you are, allowing you to feed more people.  So overall you have faster, well seasoned, hearty portions! What's not to like about that?!

Be sure you have your surface covered with plastic wrap.  You can use one large one that can be doubled back over the top of the chicken, or two pieces - one for the bottom, one for the top.  You could also use a large zip top bag. If you can help it, you don't want to pound directly on the chicken without this layer of plastic "protection" because the chicken will be much more likely to tear.

To pound the chicken, you can use a mallet made for this duty, a heavy skillet, a rolling pin... I've even used an empty bottle (beer/wine) in a pinch when cooking at someone else's house (think back to those grad school days) whose kitchen was clearly not set up for cooking much of anything.  For this recipe, I merely wanted to even out the thick and thin ends of the breast.  For some other recipes, such as piccata where you need a really thin result, I sometimes cut the breast into medallions first, then pound each one out individually.

Written Method:
Preheat oven to 400 degrees.  Pound out chicken breasts to flatten evenly. You don't need them like a pancake.  Just even out the thickness* (see Food Nerd Notes at bottom). This will give you a much more even cooking time, since you won't have a fat (undercooked) end and a thin (overcooked) end. Marinate the chicken for about 30 minutes in 1/4 cup extra virgin olive oil, 2 Tbsp soy sauce, 2 tsp McCormick Montreal Chicken (or Steak) Seasoning. Just fyi - If you leave the marinade on much longer than that, it can make the meat too salty.  Season with pepper.  Grill chicken until no longer pink.  Actually, the weather was terrible, so I just used my grill pan to do this on the stove top. By all means, use your outdoor grill if you prefer. You could also bake or pan saute the chicken, but esthetically, I think they look prettiest when they have the grill marks on them.  
One important thing to remember here, is that you are also going to finish the chicken off in the oven, so you don't need them to be 100% cooked yet.  You don't want to end up with overdone, dry chicken by the time you serve it. Remember that the internal temperature will continue to rise several degrees after you turn off the heat. The recommended cooking temperature for chicken breasts is 165 degrees F, so I turned off the heat at about 155 F, taking into account the continued temperature rise and the additional oven time coming up to finish off the dish. 
Top each chicken breast with one tablespoon barbecue sauce*, 1/4 c. shredded cheese, 1/4 c. drained Ro-tel tomatoes, chopped green onions and one tablespoon of bacon bits.  I'm not the hugest fan of BBQ sauce, so I didn't add the sauce directly to the chicken. Instead, I "painted" it on the plate. But if you and your family enjoy it, add it to the chicken before the other toppings go on.
To me, the nice thing about this recipe is that you don't have a long strip of bacon that is hard to cut, and that pulls off the toppings when you attempt to do so.  Using the bacon pieces (whether the ones from the bag, or some crisp bacon that you have crumbled yourself) alleviates this issue.


Place in oven and bake uncovered until cheese is melted (about 5 minutes). I just kept them on the grill pan and put the whole thing in the oven. I actually prefer mine with a dollop of sour cream. The end result is a tender, juicy chicken with a nice smokiness and southwestern flavor to it.

Follow me on Pinterest

Follow Me on Pinterest